How To Do A Bike Wheelie? Step by Step
/ Tips / How To Do A Bike Wheelie? Step by Step
In general, how to do a bike wheelie is something that requires a lot of practice. It’s all just a balancing act, and once you understand how it all works, it won’t be a thing at all.
But here’s a thing! Learning this trick is not that easy. Even some of the professionals out there don’t know how to do a bike wheelie. Still, you see some kids doing it well. It is all because they have given it time and practiced a lot.
There are two different techniques when doing a wheelie, and we are going to elaborate on both of them in the following text! You can start working on any of them according to your ability and skill at riding a bike.
If you can learn any one of them, doing the other one will become more straightforward because it’s all about balancing your weight on your MTB.
Step-By-Step on How to do a Bike Wheelie (Pedal Wheelie)
First, for this process we will highlight all the steps you need to take to get that wheel up. From there on, you will have to start that balancing act. You won’t learn and do it on the first try, but you will get better over time with practice.
Start by Wearing a Helmet

First off, you need to wear your helmet just like the Troy Lee Designs All Mountain A1 MIPS Helmet before you start your wheelie thing. It is protective gear, and you need to wear it generally while riding as well. You will also respect your fellows for not being reckless about MTB riding.
Select the Right Terrain

You have to select the right terrain or surface according to your experience, skill, and ability. If you don’t have much riding experience, you need to start on a grass field to cush your fall.
Make sure to test the surface’s hardness by riding it before you start working on the move. If you have some riding experience, you can go straight away to an uphill body or a concrete path.
You have to keep your Seatpost at its Lowest
For the entire move, you need to be seated. Therefore, you should keep the seatpost at its lowest position before you make this move.
It will keep your center of gravity close to the control, and things will remain more manageable for you when it comes to balancing. But be sure that you can sit in it firmly yet comfortably and are not slipping backward.
Keep a Low or Medium Gear
You have to keep your bike in low or medium gear, which will allow you to ride a wheelie on a mountain bike at a walking pace. Going too low or too high will make it difficult for you to pedal and control your bike. You can make adjustments to the gears once you find your feet according to the terrain.
Set your Cranks at 11:00 (5:00) Clockwise
When you keep your cranks in this position, you will extract the most drive from your initial pedaling. Initiate your initial thrust from 11:00 and use your stronger leg that you mostly use to start pedaling forms standstill.
Try to Shift your Weight Forward
You must bend your arms and start leaning forward with your upper section to attain a crouching position. But keep seated because it will allow you to load the spring and create more force to make sure you can easily lift the front wheel with a quick backward lean.
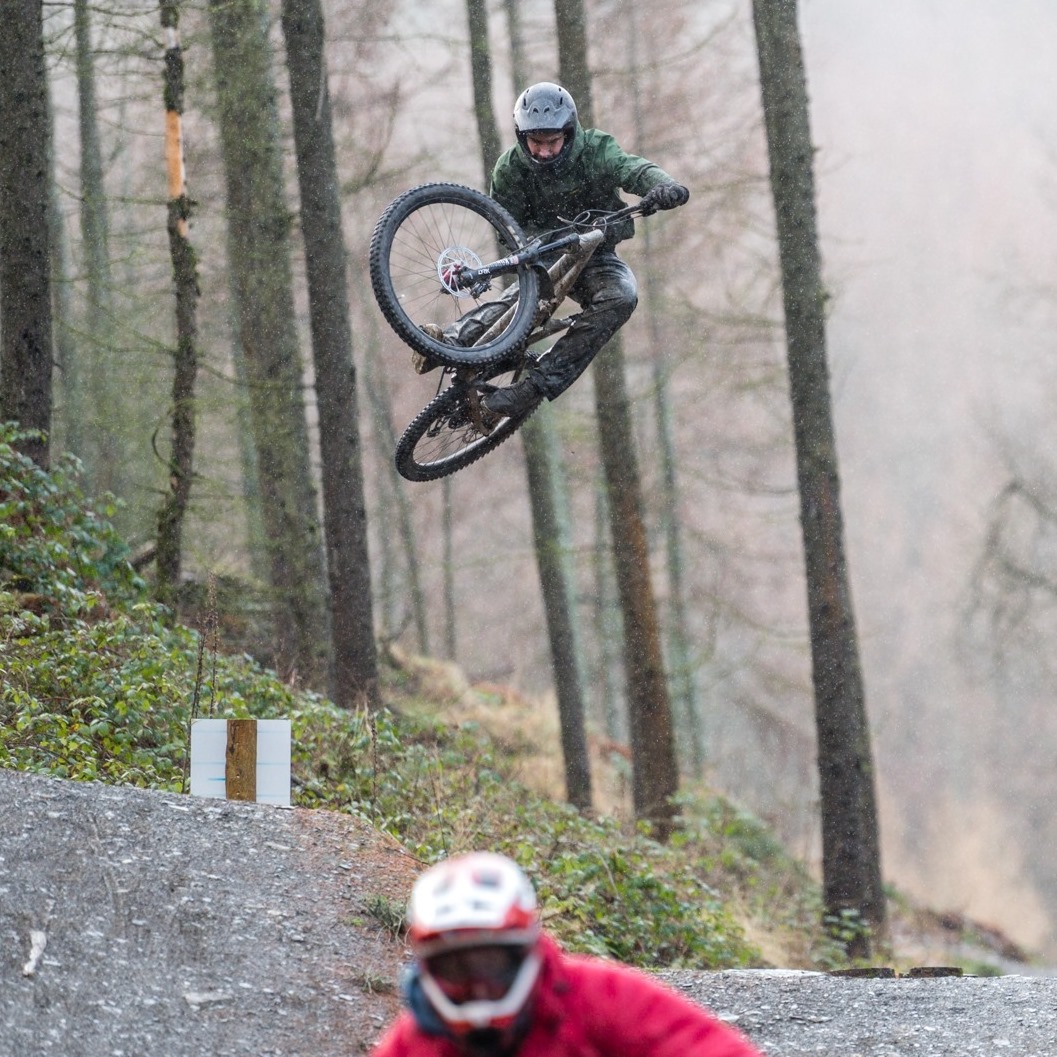
Lean Backward Fast

Keep in mind that you will have to make this move with a sharp backward lean. And at the same time, you will have to give a powerful pedal stroke as well. Don’t pull your handlebars back and keep your arms straight. You won’t need to pull back, and your front wheel will pop up.
Keep pedaling at a constant rate because stopping here will make the front wheel fall back. You need to have one of your fingers on the rear brake and a firm grip on the handlebar for balancing purposes.
Control you Balance Both Ways

You have to control your balance both vertically and sideways simultaneously. Keep feathering your rear brake to lower your front end or pedal to lift it. It will allow you to manage your vertical balance. Try to flare your arms and knees out or even turn your handlebars opposite to the bike’s leaning position to maintain sideways balance.
Straighten your Front Wheel Before you Finish the Move

If you are looking to finish the move, then you must bring down your front end and land the wheel on the ground. But keep in mind that you have to keep the handlebars straight before you land the wheels. Also, don’t lean forward too far; it’s just about leaning slightly forwards and keeping your body weight in the center of your mountain bike.
Another Way of Doing It (Manual Wheelie)
In the above process, we have discussed a step-by-step process of performing a pedal mountain bike wheelie. There is another way of doing it, and in this section, we will discuss that. The other way of how to do a bike wheelie is the manual way.
Again, start by Wearing a Helmet
You can begin by wearing a helmet just like the one by Troy Lee Designs because you will be moving faster when you will be doing a manual wheelie compared to a pedal wheelie. A helmet will keep you safe if you fall.
Choose a Downhill Surface and go at a Medium Pace
Once you have figured out how to balance, coating this wheelie downwards will be more comfortable. This is because here, you are not pedaling. You will be moving at a steady pace with the downhill slope.
Set the cranks to 9:00 (or 3:00)
You will have to set the crank levels at 9:00 or 3:00 to perform a manual wheelie because you need to keep your body weight in the center. Your bike’s crank will move slightly backward, but you won’t need to pedal at all.
Lean towards the Handlebars and then Back Fast
Remember, you need to keep your front wheel lifted by shifting your bodyweight backward and just by a margin by pulling your handlebars. Don’t forget to keep your arms straight at this point and your feet at one level with each other but right on the pedals.
Keep your rear right behind the seat. This will make your body be in a U-shaped position with your legs and arms all stretched out.
Put your Weight around the Rear Wheel
You have to find a balancing point right over the bike’s rear wheel and maintain it for costing with your front wheel in the air. As you lean back and straighten your arms, you need to push forward on your pedals but don’t start pedaling. It is just for adjusting your balance.
Keep your front Wheel around 1 to 1.5 feet in the Air
Keep your balance steady and add your front wheel around 1 to 1.5 feet in the air. Rock your hips backward if your front wheel falls too much. And put the rear brake in if the finest wheel is falling back too much.
Now, finish the move by Landing the Front Wheel
You have to put in rear brakes a bit more to land the front wheel and maintain your balance steadily.
Some Important Tips to Follow
All the intricate and slight movements have to be made in the tendon and a continuous manner. And that is precisely why this move is difficult.
Make sure that you are wearing your pedal and other safety gear while trying out this move. You must ride your wheelie with flat pedals like the ones by OneUp Components, and don’t go for clipped pedals like the ones by CrankBrothers when making this move.
If you are doing it for the first time, make sure you are trying this move on a slightly uphill surface. You also need to practice more and more to hop off the back of your bike. This will help you to recover and get back to what you were doing in no time.
Keep in mind that there is no such thing as perfect balance. And you will always be minus or plus in your balancing point. With practice, you will be able to correct the balance quicker.
Also, keep in mind that you don’t put your weight on the handlebars once you have your front wheel in the air. Moreover, don’t try to pedal too fast to gain control. It will backfire, and you will start pedaling extremely fast, and things will get out of control in no time.
Final Word
How to do a bike wheelie is not that difficult of a process. You must begin by adjusting your seatpost to a lower position. You’ll ride the wheel while seated, and a lower seatpost will keep the center of gravity closer to the ground and well-balanced.
Start at a rolling speed and keep your mountain bike in low or medium gear. Make sure to crouch your upper section. It will keep your weight over the handlebars.
For controlling both the balances, the sideways and the vertical. You can adjust the vertical balance with your rear end brake’s if you are leaning way too far back. Pedaling will help you if your front end is starting to drop.
Sideways balance can be adjusted if you try to stick out a knee or your foot. You can also do this by oppositely turning your handlebars. However, keep in mind that your handlebar is straight when you land your front wheel. Allow your front wheel to land if you want to finish the move.
Below is a Pinterest friendly photo… so you can pin it to your Mountain Bike Board!

Related Articles
What Does Travel Mean On A Mountain Bike?
Oli L • March 22, 2022
When you start mountain biking you will hear the term "travel" quite a bit. But what the heck is travel and what does it have to do with mountain biking? "Hey, dude, how much travel do you have on your front fork". This is something you will hear often and it's referring to how much suspension you have on your bike. Travel on a mountain bike is the distance you...
What Is A Mountain Bike Dropout?
Oli L • March 1, 2022
The Mountain bike dropout is not a topic of most conversations when it comes to mountain biking. These components are located on the fork-end and features a section in the frame or the fork, where the wheel can quickly be loosened and removed in the need of a wheel change. In more technical terms, it refers to a slot located in the rear axle of the mountain bike, that allows...
How to Manual on a Mountain Bike
Oli L • November 9, 2021
When you're cruising on a mountain bike or pacing through a trail, you face different problems. One such problem is the obstacles that you face while conquering trails. To overcome these obstacles, there's a popular skill that is known as a manual. With a manual, you can pass over these obstacles in style and comfort. And like every skill, this mountain biking skill requires practice. Because without practice, even if...
How To Clean Disc Brakes on A Mountain Bike
Oli L • October 21, 2021
Want to learn how to clean disc brakes on a mountain bike? Here you’ll find out what you can use to clean your mountain bike disc brakes, how to detach the disc brakes and their entire cleaning in your garage. Mountain Bike Disc Brake Cleaning Overview You can clean your mountain bike disc brakes after removing your wheels, wiping those brakes with brake cleaner and a clean rag. You can...
Hydraulic Disc Brakes Vs. Mechanical Disc Brakes
Oli L • September 9, 2021
One of the most common topics in the biking world is "hydraulic disc brakes vs. mechanical disc brakes." And so it should be because most of the bikes either come with hydraulic disc brakes or mechanical ones. Hydraulic disc brakes are the dominant of the two. These brakes are complex but reliable. However, mechanical brakes are under-performing but straightforward than their counterparts. So, which one will be better for your...
Latest Articles
Popular Articles
Product Of The Week
Monday 13th July