Tubeless Mountain Bike Tires Maintenance Guide
/ Tips / Tubeless Mountain Bike Tires Maintenance Guide

Tubeless mountain bike tires have taken the mountain biking world by storm. They’re lighter, more customizable, and can repair small punctures themselves.
But they aren’t exactly on the cheaper side. So when you get a maintenance issue, you want to resolve it rather than buying a new tire.
Luckily, tubeless mountain bike tires can be easy to clean and repair, with the right tools and knowledge. In this tubeless mountain bike tires guide, we’ll go over the benefits of tubeless tires and their maintenance.
We talk about how often you should add or replace your sealant. And we also look at some general cleaning tips that will improve the lifespan of tires.
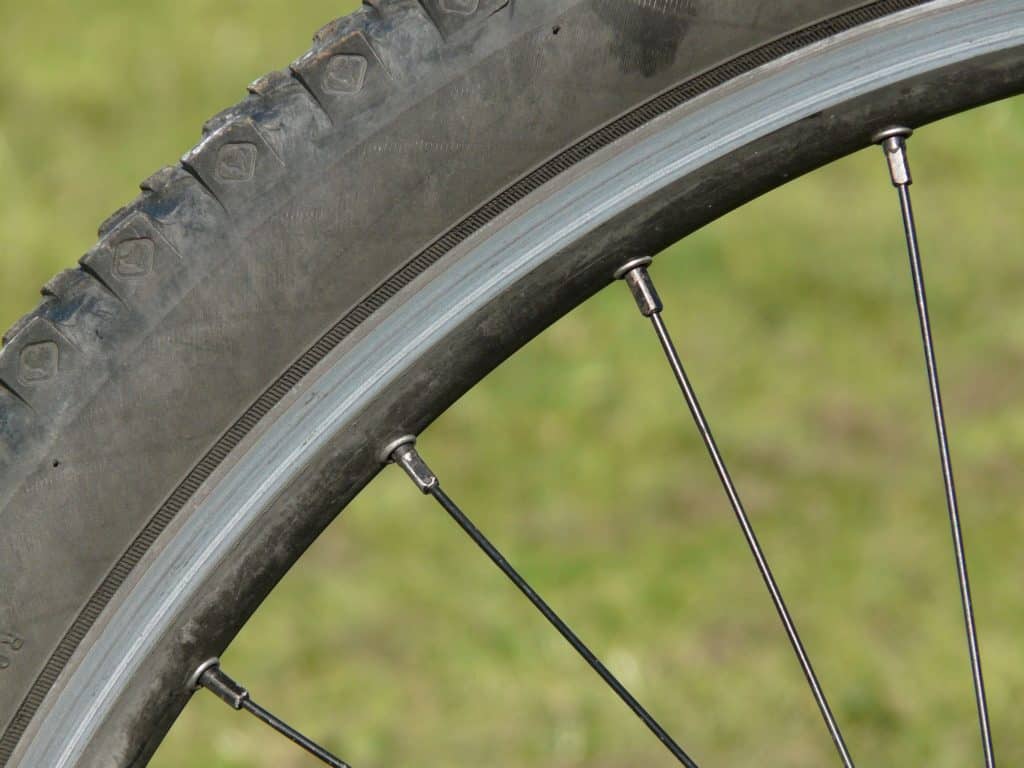
What Are Tubeless Mountain Bike Tires?
Tubeless mountain bike tires are different from pneumatic tires as they don’t use a tube. To keep the tire from deflating, they use a special sealant around the rim to prevent punctures.
You’ll need to seat the tire onto the rim and inject the sealant through any method described below.
Lesser Punctures
There’s one major bit about tubeless tires; they’re self-repairing. Tubeless mountain bike tires will heal punctures on their own. The sealant will clot up at the sight of the injury and you don’t have to stop to inflate your tires.
Some air can still get out while the sealant is starting to clot up. And bigger cuts will require manual treatment. But for the most part, your tubeless mountain bike tire will take care of it.
More Pressure Control
Tubeless mountain bike tires allow you to vary the pressure inside your tire without worrying about flats and bumpy rides. Yes, there’s a limit to this. But being able to run at lower pressures has actually been proven to be better for your bike ride.
The reason being, lower pressure allows you to feel more grounded, and help you bring out the best in your tire’s traction. Plus, your tire can easily contort around objects, which would otherwise cause unwanted punctures.
Lighter Setup
Finally, tubeless MTB tires are so much lighter than pneumatic tires. Since they don’t use bulky tubes, the best tubeless mountain bike tires can weigh around 1 to 1.5 pounds or less. This means lesser resistance when going uphill, and lesser force when going downhill.
How To Add Sealant To Tubeless Mountain Bike Tires
There are two ways you can add tubeless mountain bike tires sealant:
Through The Valve Core:
You can add in sealant like the Muc Off Ultimate Tubeless Setup into your tubeless tire through the valve core. Firstly, undo the valve core. You can do this by using a valve key, which will either come with the tire or can be bought at any hardware store. Place the key onto the valve core and rotate it anti-clockwise. Make sure the valve core is near the bottom of the tire and not the top since the sealant could dribble out that way.
Muc-Off has a great product you can keep with you for unexpected punctures.
Now you need to inject the sealant into the valve core. There are two ways you can go about doing this: through the sealant bottle or a syringe. Most sealant bottles have heads that are designed to make refilling easier. However, you won’t be able to see how much sealant you’re adding.
The best way is through a syringe. Buy a syringe, suck up some sealant, and inject it into the tire through the valve core. This way, you can measure the amount of sealant going in. Roughly 60 milliliters is enough for most road tires, but mountain tires will require as little as 20-25 milliliters.
Now replace the valve core and tighten it firmly, but not too tight, as it may strip the threads.
Reseat The Tire
This is the harder way to go about things. You need to remove the tire from the wheel and fill it up with sealant like the Stan’s NoTubes Tire Sealant. Use this as a secondary method.
It’s recommended to use a compressor pump or a canister. Deflate the tire and gently unseat the tire from the rim using a tire lever. Inject the sealant through either the syringe or the bottle and add as much as you need. After you add the sealant and get your tire back on the rim you will want to use a compressor pump to reseat the rim. You will hear lots of noise when the tire reseats onto the rim, don’t be alarmed.
How Frequently Should I Refill The Sealant?
Depending on your type and frequency of use, you should replace your sealant every 3 to 6 months. As already mentioned, this depends on where and how often you use the tire.
While it may not seem like it, your tire is constantly in the process of acquiring punctures and heating itself. And as such, you’re unaware of the various punctures you’ve acquired over time.
However, frequent punctures waste a little bit of sealant every time. And this is all considering the sealant itself is well intact.
But that’s not always the case. Your sealant can start to dry up inside your tire, especially if it’s water-based. But latex-based sealants are no better. They tend to form clumps more often inside your tire, leaving you with more mess to clean up.
Tubeless Mountain Bike Tires Maintenance
Maintaining a tubeless mountain bike tire setup is quite different from a regular setup. They have a different composition for different maintenance requirements.
Identifying Punctures
Punctures on tubeless tires can be hard to identify, provided, the sealant seals them up. You most likely won’t be needing to identify punctures, but it may become necessary when you start leaking sealant.
The best way to identify a puncture is to check where the sealant is leaking from. Sealants usually come in white or blue colors, so there will be a stark contrast in between.
Identifying punctures is important as sometimes if the cut is too big, your sealant won’t be able to fix it up. The clot formed by your sealant will pop out, and your inner tube won’t save you either.
Treating Big Cuts And Punctures
In continuation with the previous point, if you have found a big cut or puncture on your tire, here’s how you can fix those.
The easiest way to fix it is like traditional tire punctures: by patching a piece of the tire to the inside. You can use heated rubber that, when cooled, will seal up the cut from the inside.
You can also buy dedicated tire boots that act as airtight patches to seal up big cuts and seams. Additionally, you may invest in a plug. These will wind in externally and can be pulled off. They’ll plug the gap in, and you’ll be on your way.
Subsequently, if the tire is too old or worn out, you should buy a new one.
Cleaning The Wheel And Valve
The inside of the tire and the valve could take a bit of cleaning every once in a while. While there’s no official estimate, you should clean the tire every 3 months, especially if you’re noticing obvious wear signs.
Unseat the tire from the rim using a tire lever, and carefully wipe the inside using a damp towel. Most sealants are water-soluble, so they can get readily removed via a damp cloth. Perform the same operation on the outer rim, to ensure no sealant clots and dust remain.
You’ll also want to clean the inside of your valve core. Remove the valve core from the tire and either pass a rapid stream of water through or use compressed air. The reason is the sealant can sometimes get clogged up inside the valve core, which will hinder future refills.
Sealing Potential Leaks
Due to bad construction and neglect, the sealant can start leaking out, either from the valve core or from underneath the bead. Here’s how to fix it:
Underneath The Bead
Sealant leaking from under the bead is the more common occurrence but unfortunately, is harder to treat. First, you should check if there is anything that’s preventing the bead from sitting flush on the rim. This would be the case of obstructions such as sealant lumps or small rocks. If there is anything like that, remove it.
Next, look for faults during the reseating process. Not everyone knows how to reseat the tire properly. If you or someone else has done a sloppy job, you’ll need to reseat the tire again.
After that, consider lowering the pressure inside your tire, since higher pressure will force more sealant to “bleed” out.
If you can’t turn the pressure down any further within a comfortable range, resort to a professional repair shop. Or buy a new tire. It is still a good idea to check with your repair shop to know what part you need to buy. Sometimes, your wheel could be flawed too.
Through The Valve Core
This is easier to fix, though harder to diagnose. Usually, there’s an issue with your rim tape. Simply apply the tape again following the instructions.
It’s not a cause for alarm or panic. Even if you don’t fix it up, the sealant will clot up in the valve core on its own. However, a jammed valve will hinder future refills. So be sure to clean it up before each refill.
If your valve is constantly leaking and the issue has become frustrating, simply replace the valve core. Also make sure the valve core is tightly closed, as some people may have trouble using the valve key.
Conclusion
Tubeless mountain bike tires are undoubtedly some of the more useful products for mountain bikes. They are self-repairing, lighter in weight, can be customized to optimize your ride.
To summarize everything we learned today, tubeless tires should be cleaned and refilled every 3 to 6 months.
Refilling can be tricky. There are two ways you can achieve this: refilling through the valve core or reseating the tire. Out of these, using the valve core to inject in sealant is the best practice.
Lastly, don’t forget you can always take your bike to your local repair shop to get the job done or get some parts replaced.
All the best for a smooth hassle-free ride…!
Below is a Pinterest friendly photo… so you can pin it to your Mountain Bike Board!
Related Articles
What Does Travel Mean On A Mountain Bike?
Oli L • March 22, 2022
When you start mountain biking you will hear the term "travel" quite a bit. But what the heck is travel and what does it have to do with mountain biking? "Hey, dude, how much travel do you have on your front fork". This is something you will hear often and it's referring to how much suspension you have on your bike. Travel on a mountain bike is the distance you...
What Is A Mountain Bike Dropout?
Oli L • March 1, 2022
The Mountain bike dropout is not a topic of most conversations when it comes to mountain biking. These components are located on the fork-end and features a section in the frame or the fork, where the wheel can quickly be loosened and removed in the need of a wheel change. In more technical terms, it refers to a slot located in the rear axle of the mountain bike, that allows...
How to Manual on a Mountain Bike
Oli L • November 9, 2021
When you're cruising on a mountain bike or pacing through a trail, you face different problems. One such problem is the obstacles that you face while conquering trails. To overcome these obstacles, there's a popular skill that is known as a manual. With a manual, you can pass over these obstacles in style and comfort. And like every skill, this mountain biking skill requires practice. Because without practice, even if...
How To Clean Disc Brakes on A Mountain Bike
Oli L • October 21, 2021
Want to learn how to clean disc brakes on a mountain bike? Here you’ll find out what you can use to clean your mountain bike disc brakes, how to detach the disc brakes and their entire cleaning in your garage. Mountain Bike Disc Brake Cleaning Overview You can clean your mountain bike disc brakes after removing your wheels, wiping those brakes with brake cleaner and a clean rag. You can...
Hydraulic Disc Brakes Vs. Mechanical Disc Brakes
Oli L • September 9, 2021
One of the most common topics in the biking world is "hydraulic disc brakes vs. mechanical disc brakes." And so it should be because most of the bikes either come with hydraulic disc brakes or mechanical ones. Hydraulic disc brakes are the dominant of the two. These brakes are complex but reliable. However, mechanical brakes are under-performing but straightforward than their counterparts. So, which one will be better for your...
Latest Articles
Popular Articles
Product Of The Week
Monday 13th July