How To Raise Handlebars On A Mountain Bike?
/ Beginners • Tips / How To Raise Handlebars On A Mountain Bike?
Whether you are a professional mountain biker, or simply a casual rider, comfort is one of the most important things you want. The comfort of a mountain bike is determined by many things, but knowing how to raise handlebars on a mountain bike is one of the most important things you can do. It will ensure that you have complete control over the bike.

In the following article, we will have a step-by-step look at how to raise the handlebars on a mountain bike. Instead of having to deal with an uncomfortable ride, you will now have the opportunity to adjust the bike and find the most comfortable position for your needs. We hope the following guide can help you have a better cycling experience.
Why Adjust The Handlebars On Your Bike
The handlebars on your bike will determine the level of comfort you have when mountain biking. Aside from the height of the seat, which can be done with a dropper seat post, you will need to adjust it to be the same height as you will require when riding. Overall comfort is one of the most important things, but here are a few benefits of the right handlebar height:
Control Over The Bike
Most terrains will be tricky and you will need to be in complete control of the bike. Instead of having the bike control you, the handlebars will put the power in your hands. Once you have complete control over the handlebars, you can turn the bike and move as you need to.
Gear Shifts
Most mountain bikes have a sophisticated drivetrain. However, the shifters are located on the handlebars and you will need to adjust them when you are shifting gears. To avoid any issues, it is best to have the handlebars in the correct location. Once you have a comfortable position for shifting, you won’t need to worry about accidentally hitting the wrong gear.
Build Confidence
Most mountain bike trails can be hard and frustrating when you don’t know how it bends or how to take on some of the obstacles. If you have an aluminum frame, you should be able to deal with these obstacles, but having a comfortable handlebar height will give you more comfort as a rider. It is important that you feel in control of the bike to ensure you are confident.
How to Raise Handlebars on a Mountain Bike – Step-By-Step
Once you understand some of the benefits you could experience, you might find that it is a viable option to raise the handlebars on your mountain bike. However, not everyone knows exactly how to do it. In the following guide, we will teach you how to raise handlebars on a mountain bike. Now, you can have a comfortable riding experience on tough trails:

1. Find And Loosen The Spacer That Holds The Handlebar Stem
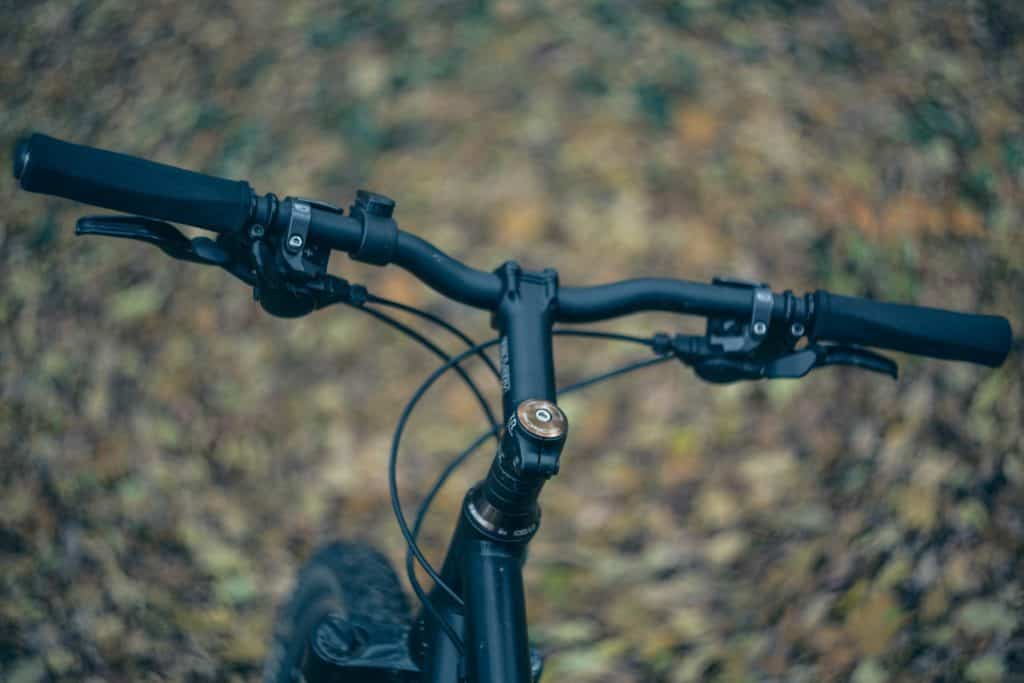
Above and below your handlebar stem, you will notice spacers. These spacers are designed to keep the handlebar in place. You will need to locate the screws on these spacers and loosen them up to access the stem. You must use the right tool to ensure that you don’t damage the components as you loosen them.
2. Unscrew The Top Bolt And Cover
On top of the handlebar, you will notice there is an additional cover. The cover can often be on top of the screw. You will need a Hex Key or Allen Wrench if you want to unscrew the top bolt. You might need to remove the cover, but we recommend that you keep it somewhere you won’t lose it. The same goes for the screws.
3. Remove The Handlebar
Once you have unscrewed the entire unit, you can start to remove it. However, you will notice that there are spacers located on top of the handlebar. These spacers are extra and you will use them in the next step. You must keep all of the components together to ensure that you don’t lose something important.
4. Determine Your Handlebar Height
Once you have all the components loose and removed, you will need to keep the bike steady. You should ask for assistance to hold it in place. Next, you will need to get on the bike and find out which height is the most comfortable for your needs. Once you have the most comfortable height, you can easily mark it by adding spacers below where the stem will be.
5. Adjusting The Height
Once you are done with your measurements, you will need to use some of the spacers that were on top of the stem to place them below the stem. This will slightly lift the handlebars to your desired riding height. If you remove the spacers, you will lower the handlebar height and this could be beneficial for shorted individuals.
6. Reassemble The Handlebar
Once you have put everything in place, you will need to reassemble the handlebar the same way you took it apart. It is best to place it on the spacers and then tighten these spacers, with one of them on top of the stem to lock it into place. The top screw is one of the most important to ensure that you don’t have a fatal accident.
***** Side Note*****
You might occasionally come across the threaded handlebars, but these are mostly designed for road bikes. Since it is harder to manually adjust these handlebars, it is recommended that you take the bike to your local bike shop. If you ruin the threaded design, it could be very frustrating for you to fix and also quite expensive.

Wrap-Up
If you need to know how to raise handlebars on a mountain bike, you have come to the right place. We hope this step by step guide helps you fix your handlebar height into a comfortable position. Once you have your bike set up correctly you will feel the confidence needed to tackle any trail.
Below is a Pinterest friendly photo… so you can pin it to your Mountain Bike Board!

Related Articles
What Are Mountain Bike Rock Gardens?
Oli L • September 5, 2022
So you're getting into mountain biking and not sure what mountain bike rock gardens are. Riding rock gardens on a mountain bike is a skill to learn when you first start riding. You might have thought that most trails will be smooth and easy to navigate through but remember that each trail is different. Preparing for these obstacles will help you become a better mountain biker. Rock gardens can come...
The Full Suspension Vs. Hardtail Debate Continues
Oli L • August 28, 2022
The full suspension vs. hardtail debate continues as we look at the pros and cons of each type of bike. Both full suspension and hardtail mountain bikes are great options if you want to start mountain biking. But what do you really need to know about each type before buying one? Mountain biking has exploded in popularity in recent years. The sport involves riding through singletracks mostly in beautiful mother...
6 Mountain Bike Maintenance Tips For Beginners
Oli L • August 8, 2022
There are many different types of mountain bikes out there. But, they all have one thing in common – ongoing maintenance. Mountain bike maintenance can be tricky if you don’t know what you’re doing, you could end up damaging your bike or even yourself. Mountain bikes require proper maintenance to keep everything running smoothly. In this article, we'll show you what to do when things go wrong as a beginner...
8 Steps To Becoming A Better Mountain Biker
Oli L • June 13, 2022
Mountain biking is an activity that requires skill, strength, endurance, and balance. It’s also a great way to stay fit and enjoy the outdoors. But before you hit the trails, there are a few things you need to know to become a better mountain biker. The activity requires both strength and skill. It’s also a sport that has become increasingly popular in recent years. To improve your riding skills, you...
5 Mountain Bike Racing Tips for Beginners
Oli L • June 10, 2022
Mountain bikes are becoming increasingly popular in recent years. They offer an exciting way to explore the outdoors. It also offers many physical and mental health benefits on top of the friendly competition that many enjoy. We're going to go over 5 mountain bike racing tips for beginners to help you get going. MTB racing is an exciting sport that combines speed, agility, and strength in a way that few...
Latest Articles
Popular Articles
Product Of The Week
Monday 17th February
